.png?width=280&height=39&name=Projectworks-Logo-Black-280px%20(1).png)
- What is a System Block?
- Digital Signature Block
- How to add a Signature Block to your Proposal
- How to set up who signs (Signing Order)
- How to choose a single or two-column layout
- How to style the signature block
- Two ways to use it: Word or portal
- How your customer signs in the customer portal
- How to lock, unlock, and void a signed proposal
- Things to note
What is a System Block?
System Blocks are a type of Content Block which are built from dynamic information, rather than static text. System Blocks can be found in your Content Library when you are in the proposal editor.
Currently we have two System Blocks available
Digital Signature
The Digital Signature block adds one or more signature lines to your proposal so it can be accepted and signed.
You can use it two ways:
- as a plain signature field for a Word (.docx) export
or - synced with the online customer portal, where your customer signs through the secure proposal link. You can pre-sign before you send, or countersign after your customer signs.
How to add a Signature Block to your Proposal
- In the proposal editor, click Content Library.
- Click "System Blocks".
- Click and drag the Signature Block into your proposal.
How to set up who signs (Signing Order)
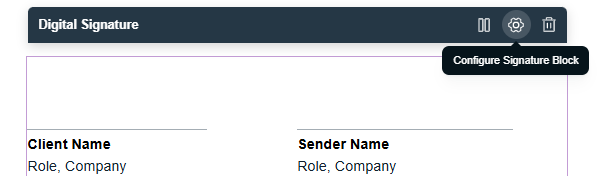
- Hover over the block and click the gear icon, Configure Signature Block.
- In Signing Order, enter the signer's First Name, Last Name, and Email Address (required), plus Company and Title if you want them.
- Set Signing As to Client or Provider.
- Click + Add Signer to add more.
You can add as many client or provider signatures as you like, or set up only the customer's signature. - Reorder signers with the up/down arrows, or remove one with the trash icon.
- Click Save.
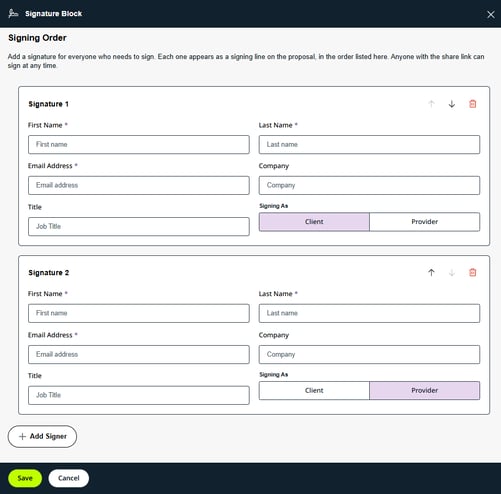
How signers appear. Each signer becomes a signing line on the proposal, in the order listed here. Anyone with the secure share link can sign at any time.
How to choose a single or two-column layout
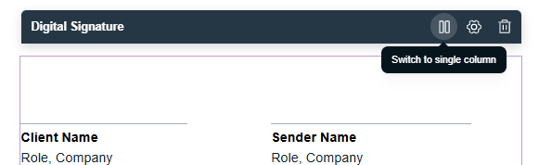
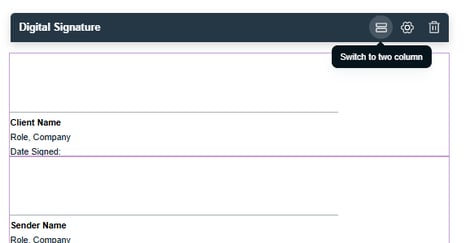
Use the columns icon on the block to switch between a two-column layout (signatures side by side) and a single column (stacked). The tooltip shows what you'll switch to.
How to style the signature block
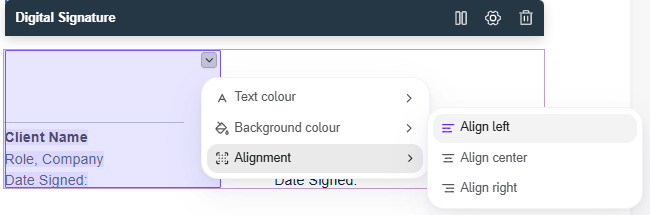
- Text colour, Background colour, Alignment Open the block's dropdown to set these. Alignment can be left, centre, or right.
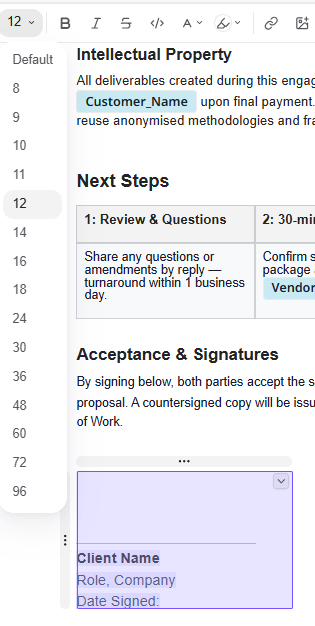
- Font and font size These use the global editor controls. Select the block, then change the font or font size from the toolbar.
Two ways to use it: Word or portal
- As a signature field in a Word export
The block exports as signature lines in the .docx, for signing by hand or in your own tool. - Synced with the customer portal
Share the secure proposal link and your customer signs online. You can pre-sign before sending, or countersign after they sign.
See How to share and export a proposal →
How your customer signs in the customer portal
When you share the secure proposal link, your customer opens it in the customer portal. There they confirm they've read each section and sign by typing or drawing, all behind the secure link. Everyone involved can see the signing history.
How to open the proposal
Your customer opens the secure proposal link. They see the proposal with a Contents panel on the left and a Signature Required badge at the top.

How to confirm each section
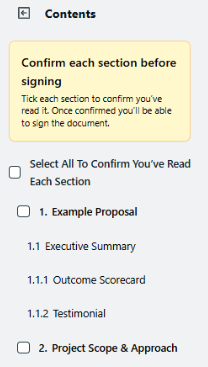
- In Contents, tick each section to confirm it's been read, or use Select All to confirm them all at once. The signature block can't be signed until every section has been confirmed.
-
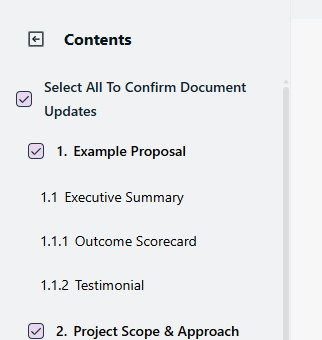
If the proposal is updated after it's opened If you edit and re-share the proposal after your customer has opened it, the checklist resets. Your customer is asked to re-confirm the changes (Select All To Confirm Document Updates) before they can sign.
How to sign
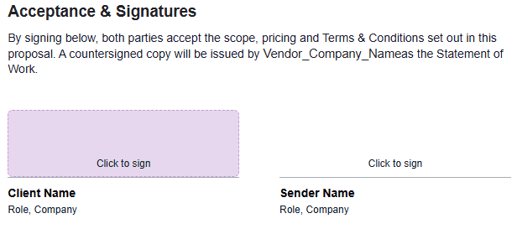
- Once every section is confirmed, the signature slots become active. Click a slot marked Click to sign.
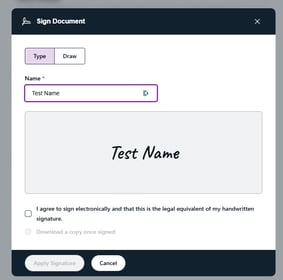
- In the Sign Document window, either
- Type your name (rendered as a signature), or
-
- Draw your signature.
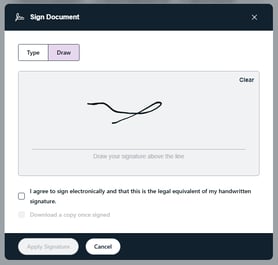
- Draw your signature.
- Tick the statement agreeing to sign electronically.
- Optionally choose Download a copy once signed.
- Click Apply Signature.
When everyone has signed
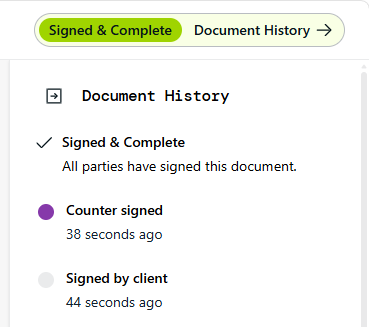
Each signed line shows the signature and the date and time it was signed. When all parties have signed, the badge changes to Signed & Complete.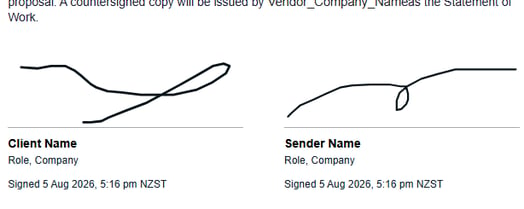
The audit trail (Document History) Anyone can open Document History to see who signed and when. The signing history is visible to all parties.
How to lock, unlock, and void a signed proposal
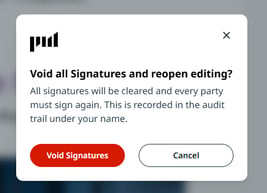
As soon as any signature is signed, the proposal locks so its content can't change while it's being signed. From the locked proposal you can Sign Document (to pre-sign or countersign) or Unlock And Edit.
Unlocking voids all signatures. Unlocking clears every signature and reopens editing. All parties must sign again, and the action is recorded in the audit trail under your name. You'll be asked to confirm before it happens.
Things to Note about Digital Signatures
- Anyone with the secure proposal share link can sign at any time.
- A proposal can have any combination of client and provider signers, including only a customer signature.
- Editing and re-sharing a proposal after it's been opened resets the confirmation checklist.
- Once any signature is applied, the proposal locks. Unlocking it voids every existing signature and requires all parties to sign again.
Pricing Table
The Pricing Table calculates a pricing table for you. Add it from the System Blocks tab of the Content Library, then open it to edit the pricing lines.
How to add a Pricing Table to your proposal
- In the proposal editor, click Content Library.
- Click "System Blocks".
- Click and drag the Pricing Table into your proposal.
- A budget screen will pop up, enter the pricing information for this proposal.
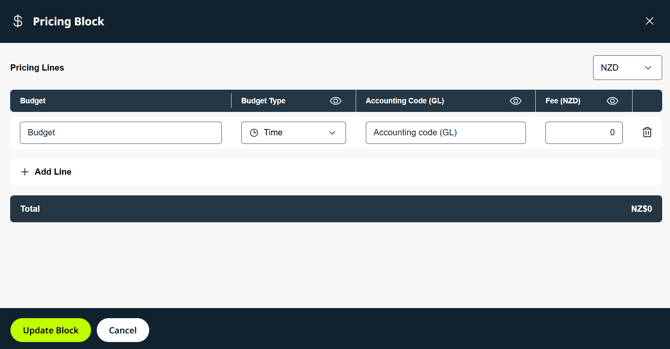
- Name of the Budget
Add more budgets by clicking “+Add Line”. - Budget Type
Choose Time or Expenses from the drop down. - Accounting Code (GL)
Choose your accounting code from the drop down. - Fee
You can change the currency in the top-right drop down
- Name of the Budget
- Click “Update Block”.
- You’ll see this has created a pricing table section for your proposal.
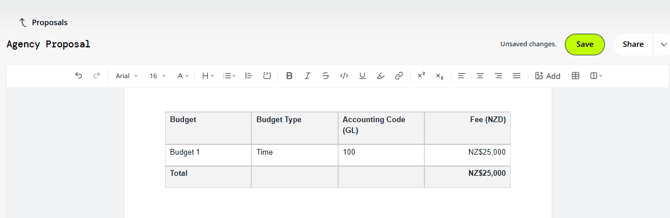
You can seed this pricing table to use its details as the budget for a project. The project must be created from a deal and that deal must be linked to this proposal.