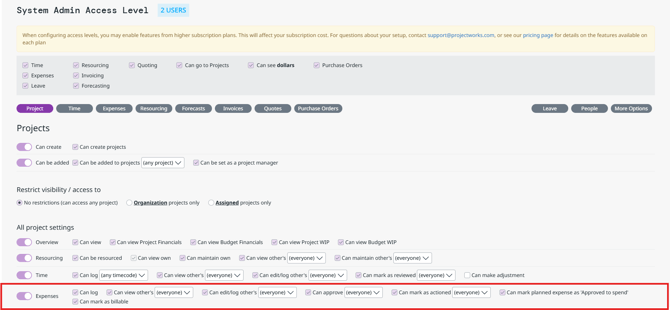
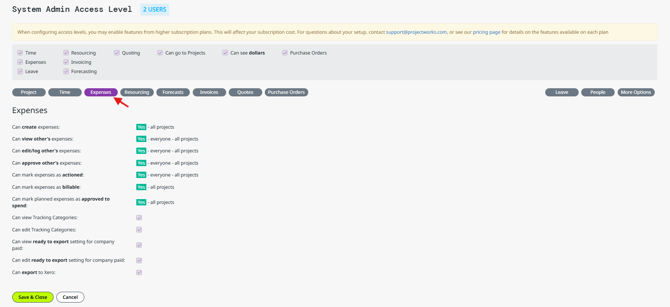
This is a one-way beta feature. If you enable a one-way beta feature, you cannot revert back to the previous single-line expense experience.
The first phase of beta allows only users with access to all project can approve expenses. Project Managers will be able to only see the lines against their projects.
- What are Multi-Line Expenses?
- How to enable Multi-Line Expenses
- How to create a Multi-Line Expense
- How to create expense lines from receipts
- FAQ
What are Multi-Line Expenses?
Previously, Expense Claims could only contain one line item for one budget within a project.
For example, one expense claim contains a single line item:
- $50 Taxi - Develop Boosters budget in Moon Landing Project
You can learn more about entering expense claims here →
With Multi-Line Expenses, a single expense claim can have multiple line items against different budgets and projects.
For example, one expense claim could contain all the following items:
- $50 Taxi - Develop Boosters budget in Moon Landing Project
- $100 Travel - Client Meetings budget in Mars Landing project
- $200 software subscription - Materials budget in Software Upgrade project
How to enable Multi-Line Expenses
This is a one-way beta feature. If you enable a one-way beta feature, you cannot revert back to the previous single-line expense experience.
- Click the Settings cog in the top right hand corner.
- Click "Beta Features" under the System section.
- Toggle on “Multi-Line Expenses”
- Click “Save”.
How to create a Multi-Line expense
- On any page, select [+ New].
- Choose Expense.
- Enter the Expense Details
- Whether the expense is already paid for or planned
- Currency
- Whether the amounts are tax inclusive or tax exclusive
- Whether the expense lines are paid by the employee submitting the claim, or company paid.
Once these selections are made, you can create expense lines.
- Add any required supporting documents.
- Create Expense Lines
The first line is created automatically for you, fill in the details.- Project
Select a project from the drop-down. - Budget
Select a budget from the drop-down. - Expense Type
Learn more about expense types → - Quantity
- Unit Price
- Sales Tax
- Billable
Check this box if this line item is to be invoiced to the client of this project. Users who cannot set expenses to billable, will not see this tick box, but the project billable default settings will still apply. - Purchase Date
- Comment
- Project
- Link Attachment to the line by selecting the file you want from the drop down menu.
- Click “Add Expense” to create another line, and fill in the Expense Line details.
- Repeat until you have created all required lines.
- Click “Submit”.
The claim can contain line items across multiple projects and budgets, but the line items must share the same Expense Details - meaning the same currency, tax status (inclusive or exclusive) as well as whether the expenses are planned or already paid, and reimbursable or company paid.
You can link one file per line, but the one file can be associated with multiple lines.
For example, if you have one flight invoice but the cost is to be split between two projects. You’ll create two expense lines with appropriate split of the flight cost and associate the same invoice with both lines.
How to create expense lines from receipts
Use Kea to read attached receipts, pre-fill expense lines and identify details that need your attention.
Before you start
- You need the multi-line expense beta enabled before you can enable receipt scanning
- You need permission to create expenses for the claimant, including when creating a claim for someone else
Enable receipt scanning
A Projectworks administrator with access to Beta Features can enable receipt scanning. The setting applies across your account; expense permissions still control who can use it.
- Go to Settings > Beta Features, under the System section.
- Turn on Expense Receipt Scan.
- Click Save.
To turn receipt scanning off, return to this page, turn off Expense Receipt Scan and click Save.
Create lines from attachments
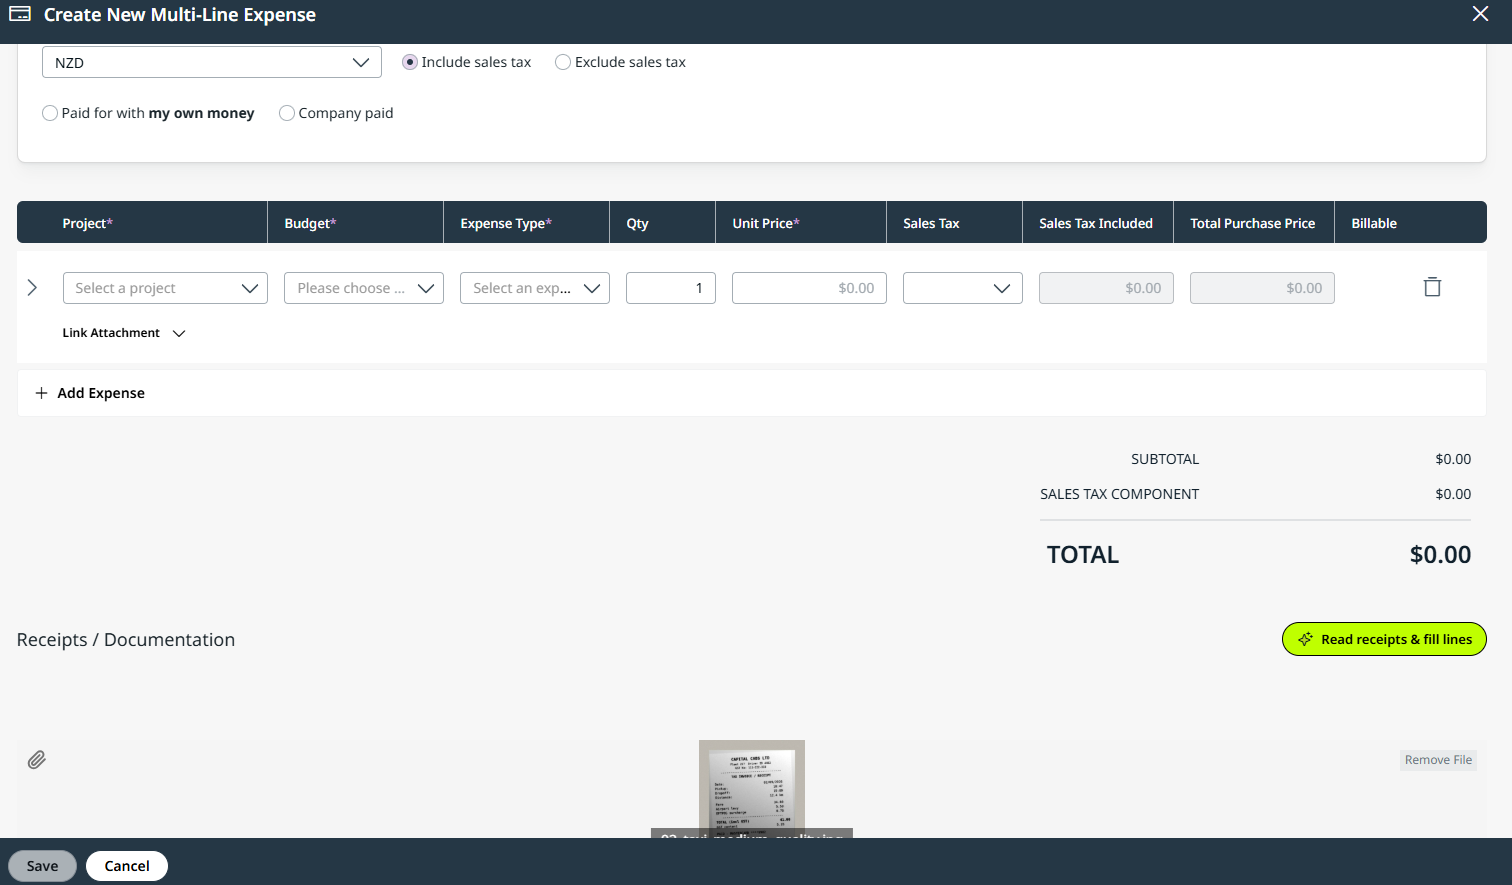
- Select [+ New] > Expense.
- Select the claim's Organization under Expense Details.
- Attach your receipts under Receipts / Documentation using Select File or drag and drop. You can attach JPG, JPEG, PNG or PDF files.
- Click Read receipts & fill lines. Kea pre-fills one line per successfully read file and links the attachment to that line.
- Review each line against its linked receipt. The What Kea did panel explains what was filled, suggested or unclear, and which fields were left blank.
- Correct any flagged values and complete missing fields. Uncertain fields remain marked until you edit them.
- Check Expense Details, including Currency, who paid and whether amounts include sales tax.
- Click Submit for a reimbursable claim, or Save for a company-paid expense.
For example, Maia attaches a $50 taxi receipt and a $20 parking receipt for a site visit. Kea fills two lines, each linked to its receipt. Maia checks the suggested projects and budgets before submitting.
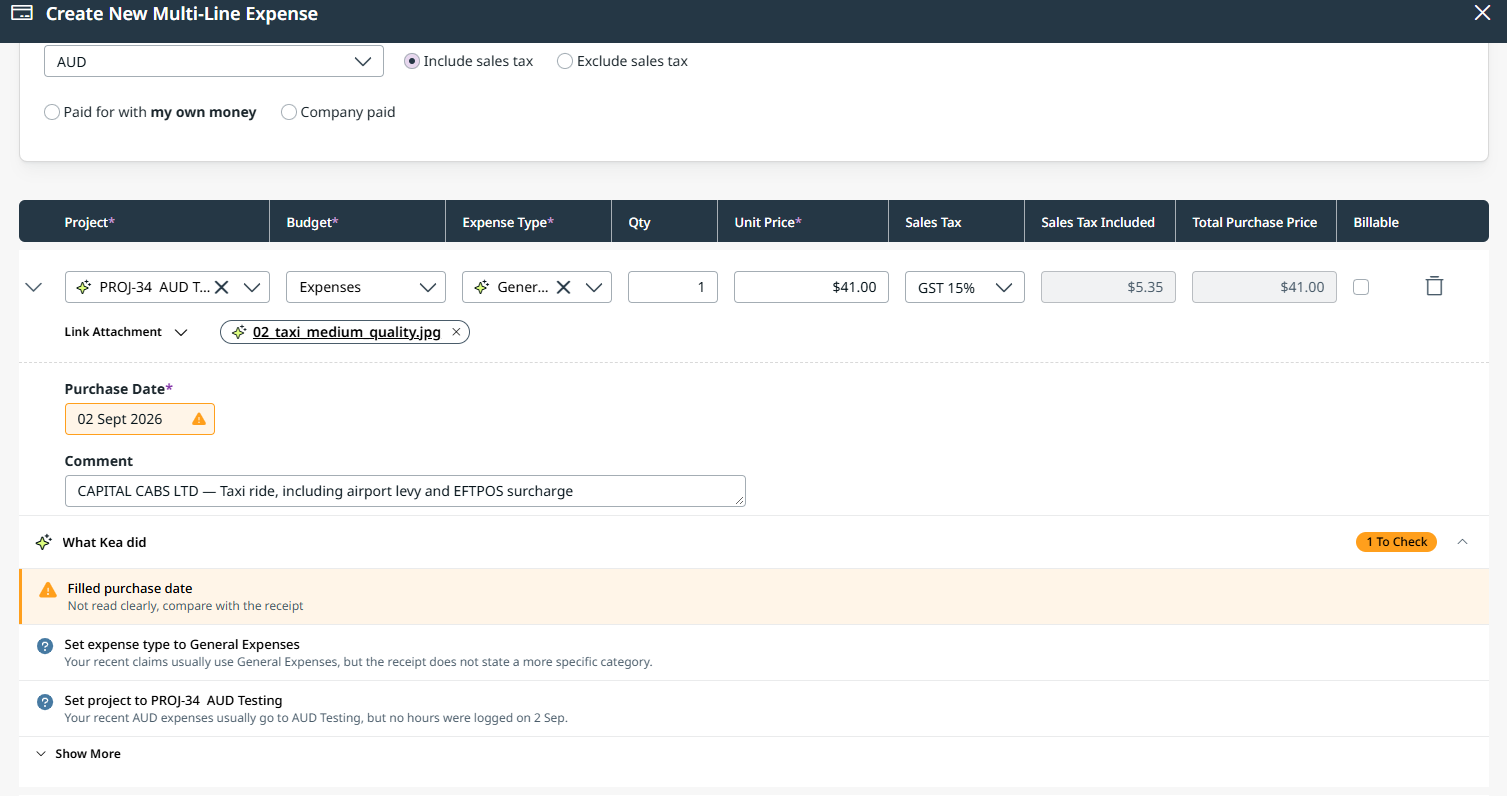
Kea can make mistakes - check amounts, dates, tax and project allocations.
Things to note
- Kea only reads files attached since you opened the claim. It cannot read attachments saved before you opened it.
- On an existing claim, the button only appears when you can edit the claim, add lines and change attachments.
- Files already read during the current session are skipped. Choose Scan again for a skipped file only if you want another line from that file.
- If Kea cannot read a file, fill its line manually.
- Reading receipts pre-fills the form. It does not save or submit the claim.
FAQ
How are multi-line expenses exported?
An expense claim with multiple lines will be exported as a multiline bill to pay in cases where it is either reimbursable or a planned company paid expense.
Is the approvals process multi-line expenses different from single-line expenses?
For the first phase of the Beta, only people who can see all project are able to approve the expenses. Project Managers can see the lines and the associated attachments relating to their projects, but not approve them if they don’t have access to all the projects in the claim.
For example, if the claim has expenses for Project A and Project B, and you don’t have access to Project B, you can only see Project A related lines and their attachments, but if you have access to see all projects, you can see all the lines, attachments and approve the claim.
Support for partial approvals and attachment management will come in future phases.
Who can use multi-line expenses?
The feature can be accessed by anyone who has the appropriate expense related access level assigned to them.
This can be found in the Project - Expenses and Expenses access level section.